
| 일 | 월 | 화 | 수 | 목 | 금 | 토 |
|---|---|---|---|---|---|---|
| 1 | 2 | 3 | 4 | |||
| 5 | 6 | 7 | 8 | 9 | 10 | 11 |
| 12 | 13 | 14 | 15 | 16 | 17 | 18 |
| 19 | 20 | 21 | 22 | 23 | 24 | 25 |
| 26 | 27 | 28 | 29 | 30 | 31 |
- PySpark
- Java
- PANDAS
- Github
- list
- array
- 파이썬
- Tkinter
- Python
- Excel
- matplotlib
- Google Spreadsheet
- numpy
- string
- google apps script
- Redshift
- dataframe
- Kotlin
- hive
- GIT
- PostgreSQL
- django
- Mac
- gas
- Google Excel
- Apache
- c#
- math
- SQL
- Today
- Total
달나라 노트
Python Discord : Python으로 Discord bot 만들기 01. 시작 본문
Discord에는 bot이라는 것이 있습니다.
이것으로 여러 기능을 구현할 수 있는데 어떤 명령어를 Discord 채팅창에 입력하면 그 명령에 따른 어떤 동작을 수행한다거나, 노래를 틀어준다거나 등등의 내용이 되겠죠.
Python을 사용하여 Discord bot을 만들어보겠습니다.
Discord 개발자 페이지 = https://discord.com/developers/applications
먼저 Discord 개발자 페이지로 들어가서 본인의 discord ID로 로그인해줍시다.

그러면 위같은 화면이 뜰텐데 우측 상단의 New Application을 클릭합시다.
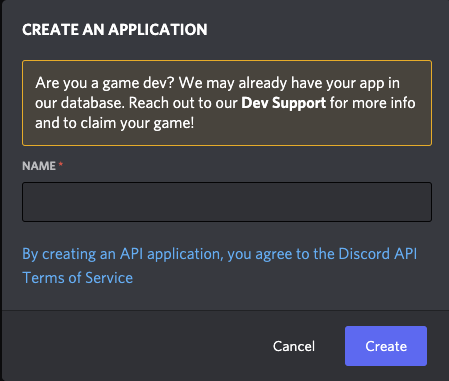
그러면 위처럼 Application의 이름을 입력해야합니다.
원하는 이름을 입력하고 Create 버튼을 누릅시다.
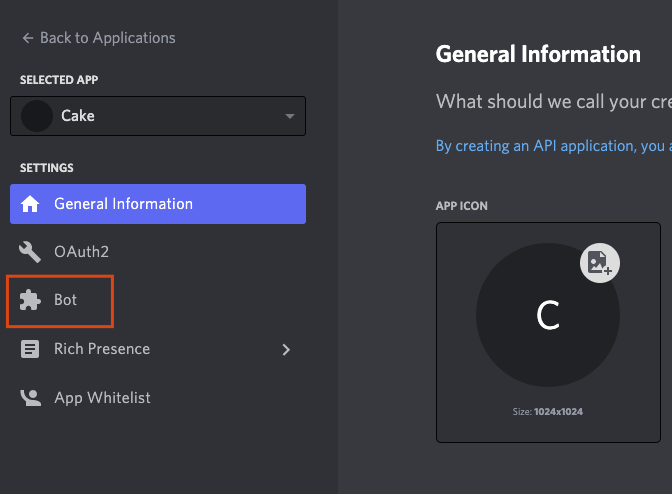
그러면 위와같은 화면이 나옵니다.
프로필 사진 설정 등을 할 수 있으며 원하는대로 설정해준 후, 왼쪽 navigation bar에 있는 Bot을 클릭합시다.
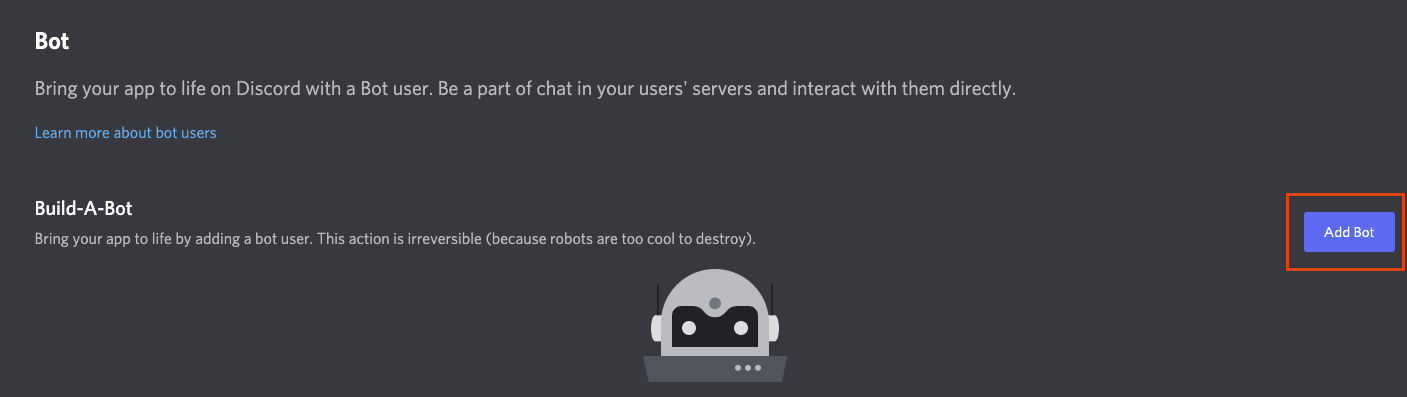
Add bot 버튼을 클릭합니다.
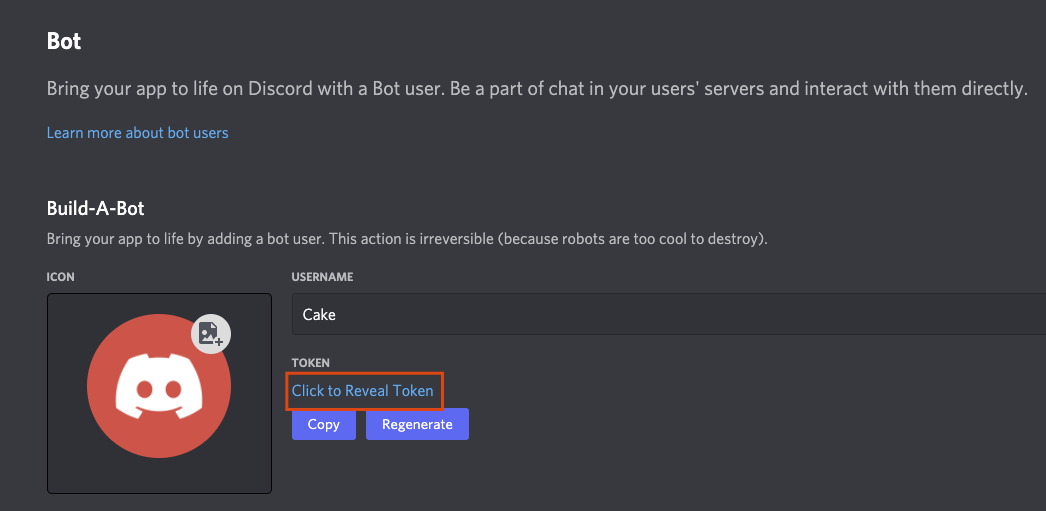
그러면 위와 같은 화면이 나옵니다.
여기서 Click to Reveal Token을 클릭해서 나오는 일련의 문자를 복사해서 별도의 메모장에 붙여넣어놉시다.
Token은 나중에 Python code를 통해 Discord에 어떤 요청을 보낼 때 필요한 인증 key같은 것이라고 생각하면 됩니다.
(Username에 Cake라고 적혀있는 이유는 위에서 Application을 생성할 때 입력했던 이름이 Cake이기 때문입니다.)
여기까지해서 Discord bot 생성이 완료되었습니다.
그러면 이제 이 bot을 이용해서 여러가지 discord 내에서 작동할 기능들을 구현해야하는데 그 전에 해야할게있습니다.
바로 bot이 어디까지 접근할 수 있는지 권한을 주는것이죠.
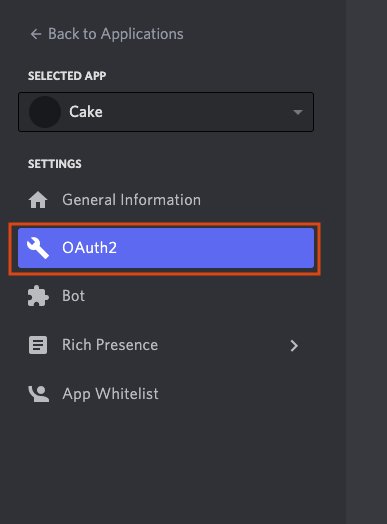
왼쪽에 있는 OAuth2를 클릭합시다.
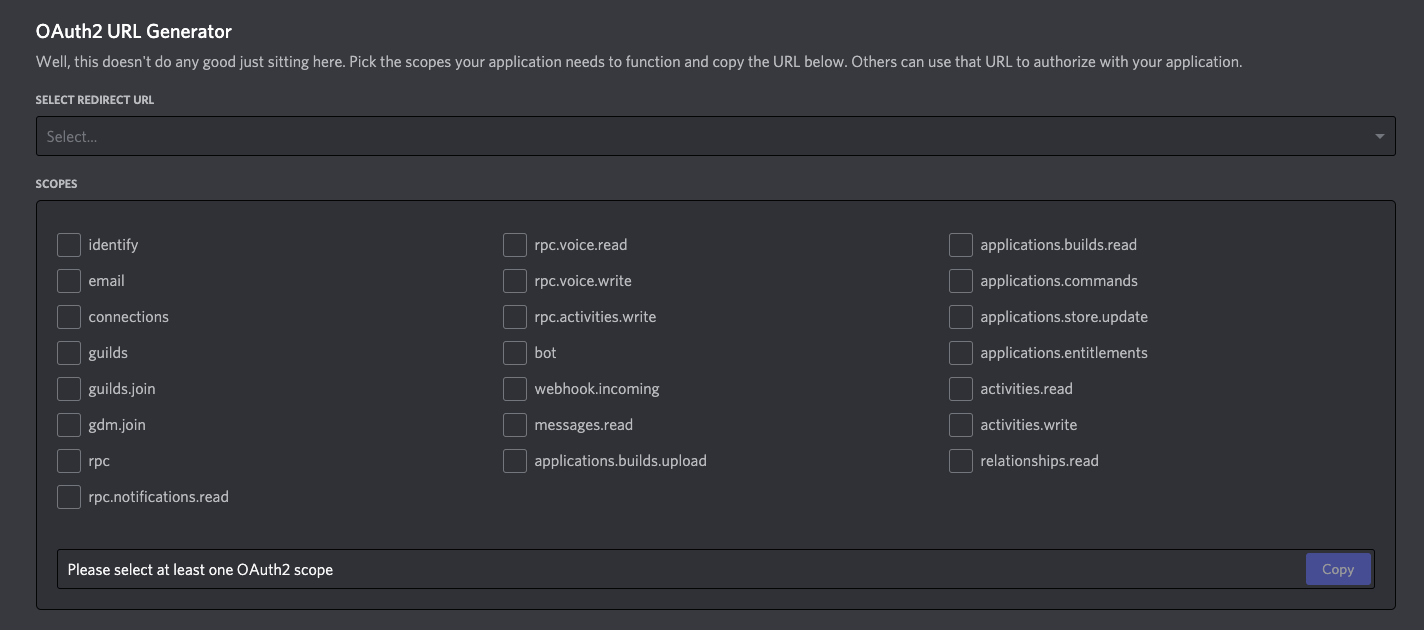
그러면 위처럼 SCOPES라는 부분에 권한을 선택할 수 있는 체크박스들이 나오는데 원하는 권한을 선택하면 됩니다.
일단 잘 모르겠으니 bot을 체크했고 아래쪽에 나오는 URL을 copy해뒀습니다.
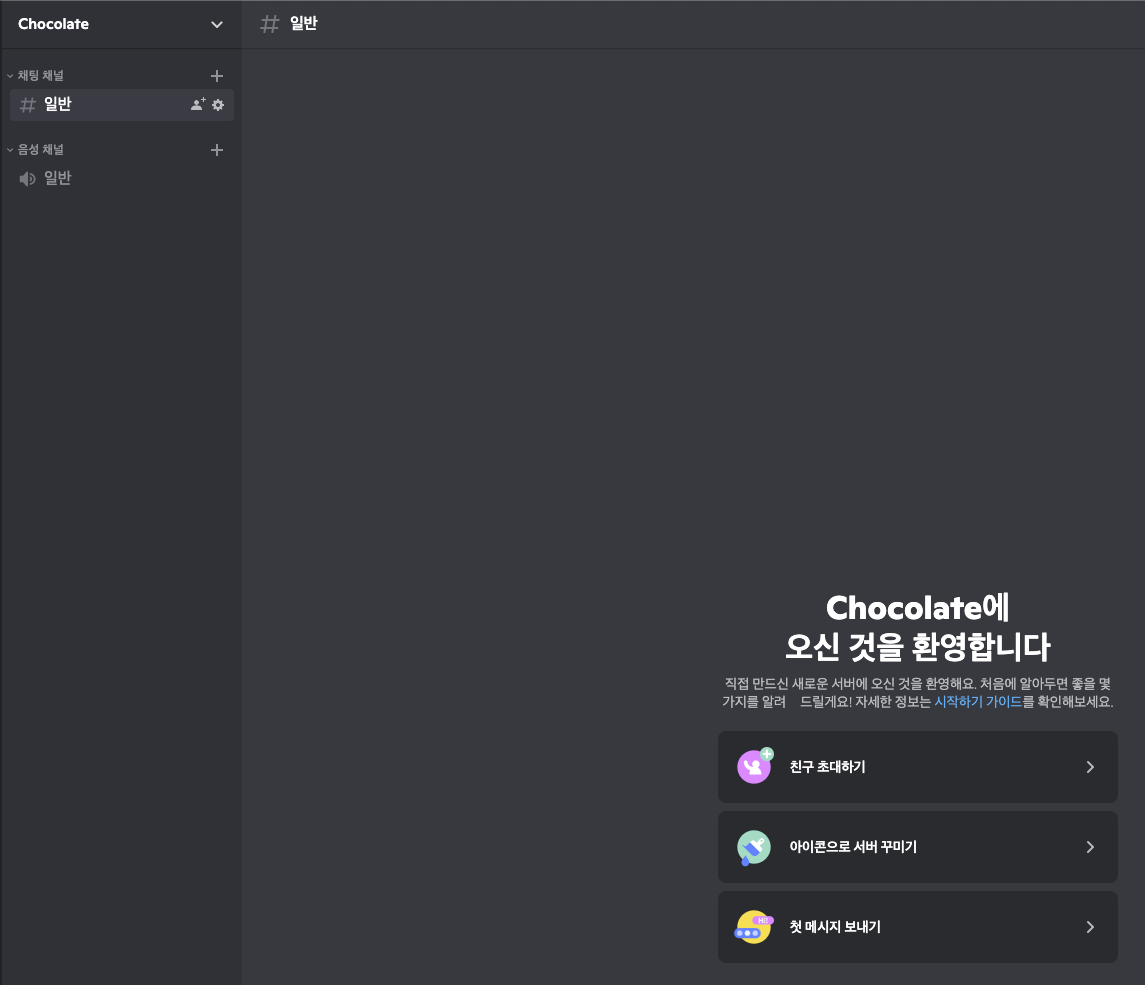
이제 discord app에서 discord bot을 이용하여 테스트를 진행할 채널을 생성합니다.
그리고 아까 Scopes에서 Bot을 선택하고 얻은 URL을 브라우저에 붙여넣은 후 엔터를 누르면 아래와 같은 창이 뜹니다.
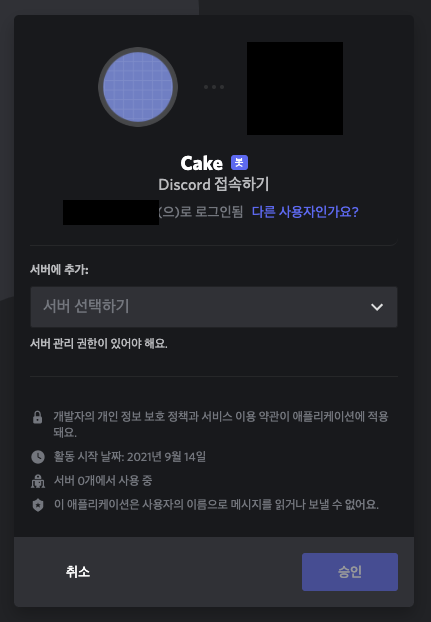
이제 bot을 어떤 채널에 추가할지를 결정하는 부분입니다.
제가 만든 채널(서버)을 선택한 후 승인을 눌러줍시다.
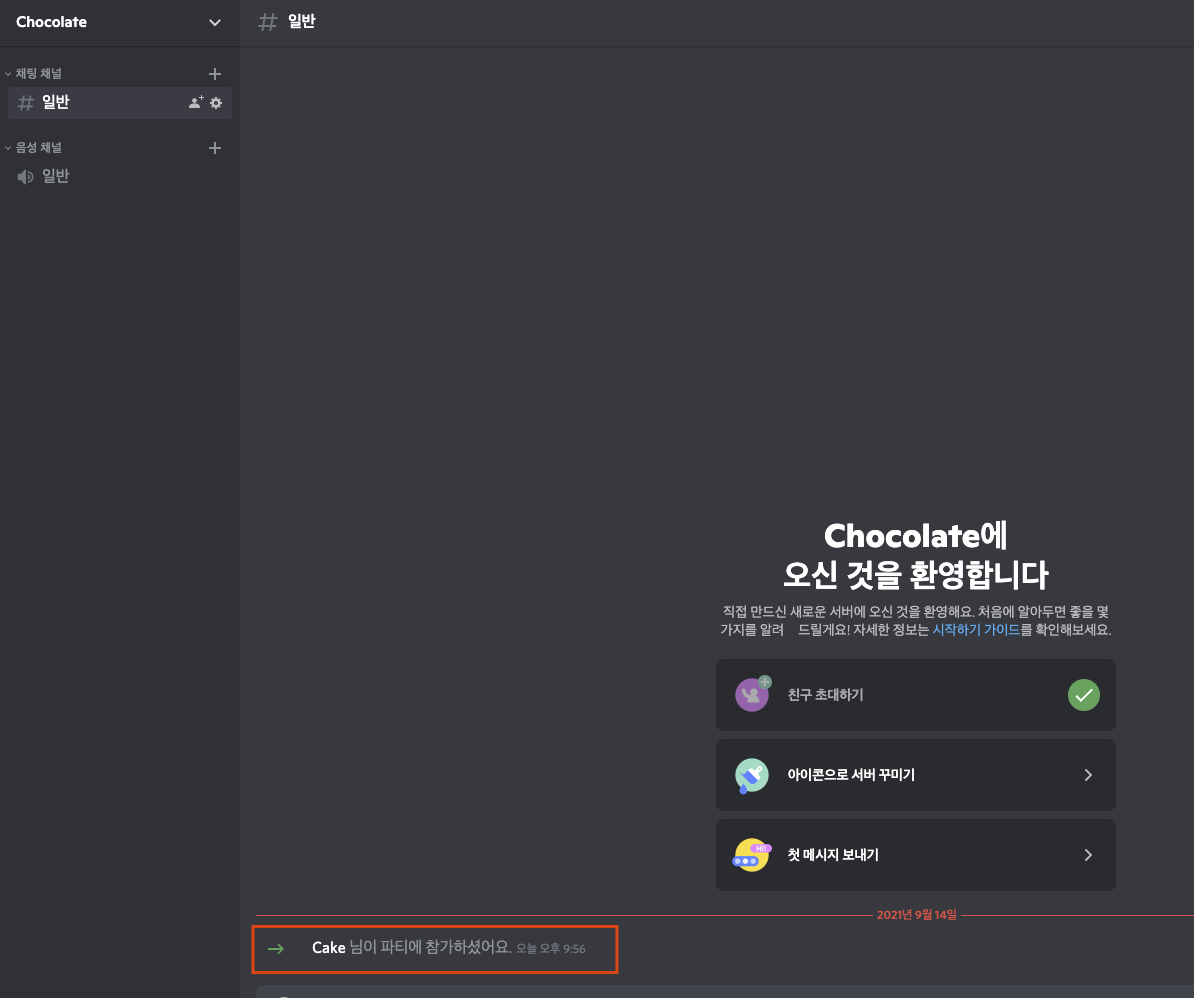
그러면 정상적으로 제가 만든 Cake bot이 저의 Chocolate 채널에 들어와진것을 알 수 있습니다.
discord bot을 python으로 만들 때에는 python에서 먼저 익혀야 할 개념이 2가지가 있습니다.
Python decorator와 coroutine입니다.
만약 decorator와 coroutine을 알고있지 않다면 아래 링크를 참고하면 좋습니다.
Python decorator = https://cosmosproject.tistory.com/385
Python coroutine = https://cosmosproject.tistory.com/474
import discord

discord_token = 'A1B2C3D4E5F6G7H8I9J10K11L12M13N14O15P16'

# discord Client class를 생성합니다.
client = discord.Client()

# event decorator를 설정하고 on_ready function을 할당해줍니다.
@client.event
async def on_ready():  # on_ready event는 discord bot이 discord에 정상적으로 접속했을 때 실행됩니다.
    print('We have logged in as {}'.format(client))
    print('Bot name: {}'.format(client.user.name))  # 여기서 client.user는 discord bot을 의미합니다. (제가 아닙니다.)
    print('Bot ID: {}'.format(client.user.id))  # 여기서 client.user는 discord bot을 의미합니다. (제가 아닙니다.)

# event decorator를 설정하고 on_message function을 할당해줍니다.
@client.event
async def on_message(message):
    # message란 discord 채널에 올라오는 모든 message를 의미합니다.
    # 따라서 bot이 보낸 message도 포함이되죠.
    # 아래 조건은 message의 author가 bot(=clinet.user)이라면 그냥 return으로 무시하라는 뜻입니다.
    if message.author == client.user:
        return

    # message를 보낸 사람이 bot이 아니라면 message가 hello로 시작하는 경우 채널에 Hello!라는 글자를 보내라는 뜻입니다.
    elif message.content.startswith('hello'):
        await message.channel.send('Hello!')

# 위에서 설정한 client class를 token으로 인증하여 실행합니다.
client.run(discord_token)


-- Result
We have logged in as <discord.client.Client object at 0x7f82642aad90>
Bot name: Cake
Bot ID: 123456789123456789123456789
그리고 code editor에 위처럼 코드를 작성한 후 실행을 시켜줍시다.
만약 제대로 되었다면 실행 창에 Result에 있는 내용이 뜰 것입니다.
이렇게 실행을 해둔 상태에서 discord로 가서 hello라고 채팅창에 쳐봅시다.
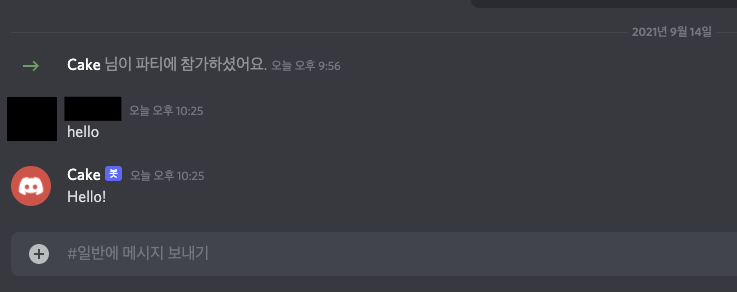
그러면 위 이미지처럼 bot이 Hello!라고 인사해줍니다.
위 코드에 주석으로 설명을 적어놨습니다.
하지만 보기 좋게 다시 코드를 하나씩 살펴봅시다.
@client.event
async def on_ready():
    print('We have logged in as {}'.format(client))
    print('Bot name: {}'.format(client.user.name))
    print('Bot ID: {}'.format(client.user.id))
먼저 on_ready 함수 부분입니다.
on_ready 함수는 discord bot이 discord에 정상적으로 접속했을 때 자동으로 실행됩니다.
따라서 on_ready 함수에 있는 print 함수들이 제대로 실행되어 python 콘솔 창에 print 함수의 내용이 정상적으로 출력된다면, discord bot이 정상적으로 discord에 접속했다는 것을 의미합니다.
또한 on_ready 함수에서는 client, clinet.user.name, clinet.user.id 등을 print하고 있습니다.
여기서 client.user는 제가 아니라 discord bot을 의미합니다.
@client.event
async def on_message(message):
    if message.author == client.user:
        return

    elif message.content.startswith('hello'):
        await message.channel.send('Hello!')
on_message 함수 부분입니다.
우선 on_message 함수를 적는 목적은 discord 채널에 어떤 메세지가 입력되었을 때 bot이 어떠한 텍스트를 discord 채널에 보내도록 하기 위함이라는걸 알고 갑시다.
먼저 on_message(message) 부분을 보면 on_message 함수는 message라는 인자를 받습니다.
message라는 인자는 bot이 들어가있는 채널에 입력되는 모든 채팅 message를 의미합니다.
예를들어 채널에 있는 저 또는 다른 누군가가 입력한 메세지, 그리고 심지어 bot이 어떠한 명령에 의해 discord 채널에 출력한 메세지까지도 포함합니다.
    if message.author == client.user:
        return
그리고 이 부분입니다. 굉장히 중요한 부분입니다.
message.auther는 discord 채널에 보내진 메세지를 작성한 주체를 의미합니다.
client.user는 제가 아니라 discord bot을 의미합니다.
즉, discord 채널에 어떤 메세지가 올라왔는데 그 메세지의 author가 discord bot(=client.user)일 경우 그냥 아무것도 없는 return 구문을 실행하여 아무 동작도 하지 말라는 의미입니다.
위 부분이 필요한 이유는 discord bot이 반응하는 경우를 오로지 일반 사용자들이 메세지를 쓸 때로 제한하고 싶기 때문입니다.
message는 discord에 올라오는 모든 메세지를 의미한다고 했었죠?
여기에는 discord bot이 채널에 보내는 메세지까지 포함된다고 했습니다.
즉, 위 부분을 적어주지 않으면 discord bot이 어떤 메세지를 보냈을 때 자신이 보낸 메세지를 보고 또 반응하여 어떤 동작을 하게 됩니다.
예를들어, hello라는 글자를 내가 채널에 썼고 discord bot이 hello라는 글자를 입력해서 똑같이 hello라는 글자를 채널에 보냅니다.
그러면 여기까지는 discord 채널에 내가 보낸 hello 메세지 1개와, discord bot이 보낸 hello 메세지 1개가 존재할겁니다.
근데 위에서 본 if 부분이 없으면 discord bot이 보낸 hello 메세지를 인식해 discord bot은 hello라는 메세지를 또 보낼 것입니다.
따라서 discord bot은 무한하게 자신의 메세지를 인식해서 hello라는 글자를 채널에 보냅니다.
그래서 위 부분은 굉장히 중요합니다.
    elif message.content.startswith('hello'):
        await message.channel.send('Hello!')
elif 구문입니다.
discord 채널에 보내진 message의 내용(=message.content)가 hello라는 글자로 시작한다면, 채널에 Hello!라는 텍스트를 보내라는 의미입니다.
message.channel.send('Hello!')가 그 부분입니다.
이 부분으로부터 discord bot이 채널에 메세지를 보내게 하려면 message.channel.send method를 사용하면 된다는걸 알 수 있죠.
client.run(discord_token)이 부분은 discord bot(=client)을 내가 받은 token을 이용하여 실행시키는 것입니다.
Python code를 실행시키면 마지막으로 run함수가 실행되고 이 run 함수가 실행된 상태일 때가 discord bot을 이용할 수 있는 상태라고 보면 됩니다.
import discord

discord_token = 'A1B2C3D4E5F6G7H8I9J10K11L12M13N14O15P16'

client = discord.Client()

@client.event
async def on_ready():
    print('We have logged in as {}'.format(client))
    print('Bot name: {}'.format(client.user.name))
    print('Bot ID: {}'.format(client.user.id))

@client.event
async def on_message(message):
    if message.author == client.user:
        return

    elif message.content.startswith('hello'):
        await message.channel.send('Hello!')

client.run(discord_token)
자 이제 전체 코드를 다시 봅시다.
대충 이해가 갈겁니다.
여기서 discord API를 어떤식으로 사용하는지에 대한 흐름을 잡아봅시다.
1. discord API에는 이미 기본적인 기능들은 모두 갖춰져 있습니다.
2. 그러나 우리는 on_ready 함수, on_message 함수처럼 우리가 원하는 기능들을 만들고 이 함수들을 client.event decorator를 사용해서 기본적으로 구성된 discord API에 우리가 원하는 부분을 추가합니다.
3. 그리고 client.run을 이용해서 우리가 원하는 부분이 반영된 discord API를 실행시킵니다.
4. discord channel에서 우리가 추가한 기능을 실행시킵니다.
만약 decorator의 개념이 어렵다면 아래처럼 코드를 바꿔도됩니다.
client.event() method의 인자로서 내가 원하는 함수(on_ready, on_message 등)를 전달해주면 됩니다.
import discord

discord_token = 'A1B2C3D4E5F6G7H8I9J10K11L12M13N14O15P16'

# discord Client class를 생성합니다.
client = discord.Client()


async def on_ready():
    print('We have logged in as {}'.format(client))
    print('Bot name: {}'.format(client.user.name))  # 여기서 client.user는 discord bot을 의미합니다. (제가 아닙니다.)
    print('Bot ID: {}'.format(client.user.id))  # 여기서 client.user는 discord bot을 의미합니다. (제가 아닙니다.)

client.event(on_ready)  # event method의 인자로서 on_ready function을 할당해줍니다.


async def on_message(message):
    # message란 discord 채널에 올라오는 모든 message를 의미합니다.
    # 따라서 bot이 보낸 message도 포함이되죠.
    # 아래 조건은 message의 author가 bot(=clinet.user)이라면 그냥 return으로 무시하라는 뜻입니다.
    if message.author == client.user:
        return

    # message를 보낸 사람이 bot이 아니라면 message가 hello로 시작하는 경우 채널에 Hello!라는 글자를 보내라는 뜻입니다.
    elif message.content.startswith('hello'):
        await message.channel.send('Hello!')

client.event(on_message)  # event method의 인자로서 on_message function을 할당해줍니다.

# 위에서 설정한 client class를 token으로 인증하여 실행합니다.
client.run(discord_token)


-- Result
We have logged in as <discord.client.Client object at 0x7f82642aad90>
Bot name: Cake
Bot ID: 123456789123456789123456789
참고자료 = https://discordpy.readthedocs.io/en/latest/index.html


