| 일 | 월 | 화 | 수 | 목 | 금 | 토 |
|---|---|---|---|---|---|---|
| 1 | 2 | 3 | 4 | 5 | 6 | 7 |
| 8 | 9 | 10 | 11 | 12 | 13 | 14 |
| 15 | 16 | 17 | 18 | 19 | 20 | 21 |
| 22 | 23 | 24 | 25 | 26 | 27 | 28 |
- PostgreSQL
- dataframe
- Redshift
- Excel
- Google Excel
- hive
- array
- Tkinter
- SQL
- GIT
- google apps script
- Apache
- Python
- Github
- Presto
- PANDAS
- math
- PySpark
- numpy
- Kotlin
- Java
- c#
- string
- gas
- list
- django
- matplotlib
- Google Spreadsheet
- 파이썬
- Today
- Total
달나라 노트
C# : KeyEventHandler (키보드 입력 이벤트, Keyboard input event, KeyDown, KeyUp) 본문
C# : KeyEventHandler (키보드 입력 이벤트, Keyboard input event, KeyDown, KeyUp)
CosmosProject 2022. 3. 30. 19:30
C#에서 Keyboard로 어떤 키를 입력하는 Event를 처리해봅시다.
using System;
using System.Windows.Forms;

class MyProgram
{
    public static void Main()
    {
        Form fm = new Form();
        fm.Text = "Sample Window";
        fm.Width = 300;
        fm.Height = 200;

        Label lbl = new Label();
        lbl.Text = "Welcome!";
        lbl.Parent = fm;

        void fm_key_input(Object sender, KeyEventArgs e)
        {
            lbl.Text = e.KeyCode.ToString();
        }

        fm.KeyDown += new KeyEventHandler(fm_key_input);

        Application.Run(fm);
    }
}
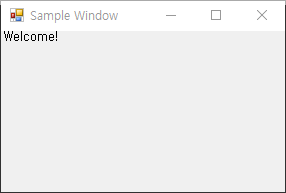
위 코드를 실행시키면 먼저 아래와 같은 창이 뜹니다.

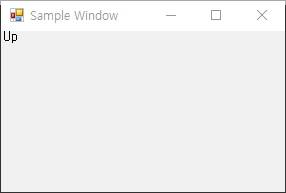
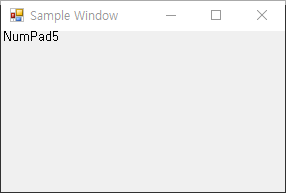
그리고 이 상태에서 키보드에서 아무 키나 입력하면 Welcom! 이라는 글자 대신 입력한 키의 이름이 출력됩니다.


이제 위 코드를 해석해봅시다.
        Form fm = new Form();
        fm.Text = "Sample Window";
        fm.Width = 300;
        fm.Height = 200;

        Label lbl = new Label();
        lbl.Text = "Welcome!";
        lbl.Parent = fm;
먼저 Window를 띄워주기위해 Form class를 이용해서 fm 객체를 생성합니다.
또한 Window에 텍스트를 표시해주기 위해 텍스트 박스인 Label class를 이용해서 lbl 객체를 생성합니다.
- fm.Text = "Sample Window";
Window의 제목을 설정합니다.
- fm.Width = 300;
Window의 가로 길이를 설정합니다.
- fm.Height = 200;
Window의 세로 길이를 설정합니다.
- lbl.Text = "Welcome!";
텍스트 박스(Label)에 표시할 굴자를 설정합니다.
- lbl.Parent = fm;
Label의 Parent를 fm객체로 설정해서 텍스트 박스(Labal)가 fm Window 내부에 표시되도록 합니다.
여기까지 기본적인 format 구성이 끝났습니다.
이제 Key 입력 Event 처리 부분을 봅시다.
만약 지금부터 설명할 내용이 어렵다면 아래 링크로 가서 먼저 C#에서 Event Handling에 대해 알면 이해가 더 쉽습니다.
https://cosmosproject.tistory.com/549
        void fm_key_input(Object sender, KeyEventArgs e)
        {
            lbl.Text = e.KeyCode.ToString();
        }

        fm.KeyDown += new KeyEventHandler(fm_key_input);
Event 처리를 할 때에는 크게 2가지가 필요합니다.
Event를 처리하기 위해서는 크게 2가지가 필요합니다.
1. Event가 발생했을 때 어떤 동작을 할지를 정해둔 method 생성
2. 생성한 method를 EventHandler에 등록
Event 발생 시 실행할 동작을 담은 fm_key_input method를 먼저 생성합니다.
fm_key_input method는 Event Handler에 등록될 것이므로 Object sender와 KeyEventArgs e 라는 2개의 인자를 보유하고 있어야 합니다.
Keyboard 입력에 대한 Event이므로 EventArgs가 아니라 KeyEventArgs 라는 parameter를 가지고 있음에 주의합시다.
또한 fm_key_input method의 내용으로서는 텍스트 박스 기능을 하는 Label(lbl)의 Text를 e.KeyCode.ToString()으로 변경하는 내용입니다.
e.KeyCode는 누른 키보드의 KeyCode입니다. 키보드의 모든 키는 각각의 고유한 코드를 가지고 있습니다.
그리고 ToString()은 KeyCode를 String type으로 바꾼다는 의미이죠.
- fm.KeyDown += new KeyEventHandler(fm_key_input);
그리고 이렇게 생성한 fm_key_input method를 KeyEventHandler에 전달하여 fm.KeyDown 이벤트에 전달합니다.
KeyDown은 키보드의 어떤 키가 눌릴 때 발생하는 Event라고 보면 됩니다.
따라서 어떠한 키가 눌리면 fm_key_input method가 실행되는 것이죠.
using System;
using System.Windows.Forms;

class MyProgram
{
    public static void Main()
    {
        Form fm = new Form();
        fm.Text = "Sample Window";
        fm.Width = 300;
        fm.Height = 200;

        Label lbl = new Label();
        lbl.Text = "Welcome!";
        lbl.Parent = fm;

        void fm_key_input(Object sender, KeyEventArgs e)
        {
            lbl.Text = e.KeyCode.ToString();
        }

        fm.KeyUp += new KeyEventHandler(fm_key_input);

        Application.Run(fm);
    }
}
KeyDown은 키가 눌렸을 때 발생하는 이벤트입니다.
- fm.KeyUp += new KeyEventHandler(fm_key_input);
근데 위 예시처럼 fm.KeyUp event에 EventHandler를 등록하면 키보드를 누를 때는 아무 변화가 없다가 누른 키에서 손을 떼면 이벤트가 발생하는걸 볼 수 있습니다.
정리하면 다음과 같습니다.
fm.KeyDown -> 키가 눌렸을 때 발생하는 Event
fm.KeyUp -> 눌려진 키가 다시 올라왔을 때 발생하는 Event
'C# > C#' 카테고리의 다른 글
| C# : CheckBox, CheckBox Event (0) | 2022.04.01 |
|---|---|
| C# : enum (Enumeration, 열거체) (0) | 2022.04.01 |
| C# : EventHandler (마우스 이벤트 처리) (Window 클릭, 버튼 클릭, 마우스 오버, Window click, Button click, mouse over) (3) | 2022.03.30 |
| C# : static (정적 데이터) (0) | 2022.03.29 |
| C# : abstract, virtual (class template 생성하기) (0) | 2022.03.23 |


