| 일 | 월 | 화 | 수 | 목 | 금 | 토 |
|---|---|---|---|---|---|---|
| 1 | 2 | 3 | 4 | 5 | 6 | 7 |
| 8 | 9 | 10 | 11 | 12 | 13 | 14 |
| 15 | 16 | 17 | 18 | 19 | 20 | 21 |
| 22 | 23 | 24 | 25 | 26 | 27 | 28 |
- gas
- Redshift
- Kotlin
- hive
- Apache
- PostgreSQL
- google apps script
- string
- Presto
- array
- SQL
- PANDAS
- 파이썬
- list
- PySpark
- django
- Python
- Google Spreadsheet
- Google Excel
- Github
- math
- numpy
- Excel
- dataframe
- c#
- Tkinter
- GIT
- matplotlib
- Java
- Today
- Total
달나라 노트
C# : Paint, Graphics, DrawImage, RotateFlip, Invalidate (DrawImage로 이미지 띄우기, Image 회전, Image 확대/축소, 이미지 회전, 이미지 확대/축소, Form 새로고침) 본문
C# : Paint, Graphics, DrawImage, RotateFlip, Invalidate (DrawImage로 이미지 띄우기, Image 회전, Image 확대/축소, 이미지 회전, 이미지 확대/축소, Form 새로고침)
CosmosProject 2022. 4. 5. 23:23
C#에서 Form에 이미지를 띄우는 방법 중 하나인 DrawImage를 알아보겠습니다.
- 참고 : PictureBox를 이용한 이미지 띄우기는 아래 링크를 참고하면 됩니다.
https://cosmosproject.tistory.com/564
C# : PictureBox (사진 띄우기)
PictureBox class는 이미지를 띄울 수 있는 박스입니다. 아래 코드를 봅시다. 참고로 저는 C:\Users\Public\arraw.png 경로에 아래 이미지를 넣어뒀습니다. 직접 그림판으로 만든 이미지인데 위 이미지를 사
cosmosproject.tistory.com
여기서는 일단 이미지가 필요하기 때문에 제가 아래 이미지를 그림판으로 그려서 arrow.png 파일로 생성해뒀습니다.
이미지가 있는 경로는 C:\Users\Public\arrow.png 입니다.

아래 코드를 봅시다.
using System;
using System.Windows.Forms;
using System.Drawing;

class MyProgram
{
    public static void Main()
    {
        Form fm = new Form();
        fm.Width = 500;
        fm.Height = 300;

        Image img = Image.FromFile("C:\\Users\\Public\\arrow.png");

        void fm_paint(object sender, PaintEventArgs e)
        {
            Graphics g = e.Graphics;
            g.DrawImage(img, 0, 0);
        }
        fm.Paint += new PaintEventHandler(fm_paint);


        Application.Run(fm);
    }
}
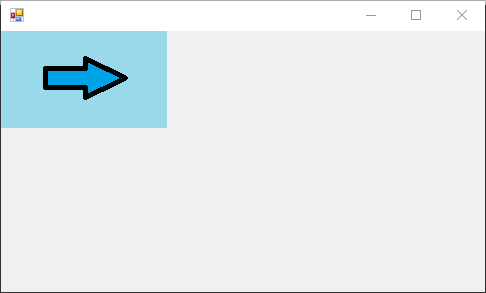
위 코드를 실행하면 아래와 같은 화면이 뜹니다.

제가 준비한 이미지가 제대로 그려졌죠.
이제 코드를 부분별로 해석해봅시다.
        Form fm = new Form();
        fm.Width = 500;
        fm.Height = 300;
Form class를 이용해서 이미지를 띄울 Form 객체를 생성합니다.
Image img = Image.FromFile("C:\\Users\\Public\\arrow.png");Image.FromFile() method를 이용해서 미리 만들어둔 이미지를 불러옵니다.
        void fm_paint(object sender, PaintEventArgs e)
        {
            Graphics g = e.Graphics;
            g.DrawImage(img, 0, 0);
        }
        fm.Paint += new PaintEventHandler(fm_paint);
DrawImage() method는 Image 객체에 저장된 이미지를 Window에 그려주는 역할을 합니다.
DrawImage() method는 Graphics class에 속해있는 method이며 Graphics는 PaintEventArgs로부터 얻을 수 있습니다.
따라서 DrawImage() method는 주로 위처럼 Form의 Paint에 Event 추가를 해서 사용합니다.
그래서 위 코드를 보면 PaintEventArgs를 받는 Event method(fm_paint)를 생성합니다.
그리고 변수인 e로부터 오는 Graphics class를 받아 g객체를 생성합니다.
g 객체에 있는 DrawImage method를 사용해서 이미지를 그립니다.
DrawImage(image_object, x, y, width, height);DrawImage는 위처럼 총 5개의 인자를 받아서 사용할 수 있습니다.
image_object --> 이미지 객체
x --> 이미지 왼쪽 상단 꼭지점의 x좌표
y --> 이미지 왼쪽 상단 꼭지점의 y좌표
width --> 이미지의 세로 길이 (생략 시 원본 이미지의 가로 길이로 적용됨)
height -->이미지의 세로 길이 (생략 시 원본 이미지의 세로 길이로 적용됨)
- fm.Paint += new PaintEventHandler(fm_paint);
그리고 이렇게 만든 fm_paint method를 PaintEventHandler에 전달하여 Form의 Paint(fm.Paint)에 등록합니다.
Form의 Paint Event는 Form이 처음 생성될 때 발생하는 Event입니다.
using System;
using System.Windows.Forms;
using System.Drawing;

class MyProgram
{
    public static void Main()
    {
        Form fm = new Form();
        fm.Width = 500;
        fm.Height = 300;

        Image img = Image.FromFile("C:\\Users\\Public\\arrow.png");


        void fm_img_rotation(object sender, EventArgs e)
        {
            img.RotateFlip(RotateFlipType.Rotate90FlipNone);
            fm.Invalidate();
        }
        fm.Click += new EventHandler(fm_img_rotation);

        void fm_paint(object sender, PaintEventArgs e)
        {
            Graphics g = e.Graphics;
            g.DrawImage(img, 0, 0, img.Width * 2, img.Height * 2);
        }
        fm.Paint += new PaintEventHandler(fm_paint);


        Application.Run(fm);
    }
}
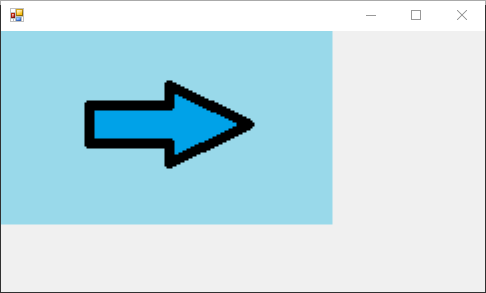
위 코드를 실행하면 아래처럼 이미지가 더 크게 나타난 걸 볼 수 있습니다.

g.DrawImage(img, 0, 0, img.Width * 2, img.Height * 2);DrawImage method부분을 보시면 가로 길이와 세로 길이를 기존의 2배로 늘리도록 설정한 것을 볼 수 있습니다.
기존 이미지 가로 길이의 2배 = img.Width * 2
기존 이미지 세로 길이의 2배 = img.Height* 2
그래서 이미지가 더 크게 나타난 것이죠.
이런 식으로 이미지의 확대/축소가 가능합니다.
여기에 추가적인 Event를 등록해봅시다.
아래 코드는 Form을 클릭하면 이미지가 회전하도록 한 코드입니다.
using System;
using System.Windows.Forms;
using System.Drawing;

class MyProgram
{
    public static void Main()
    {
        Form fm = new Form();
        fm.Width = 500;
        fm.Height = 300;

        Image img = Image.FromFile("C:\\Users\\Public\\arrow.png");


        void fm_img_rotation(object sender, EventArgs e)
        {
            img.RotateFlip(RotateFlipType.Rotate90FlipNone);
            fm.Invalidate();
        }
        fm.Click += new EventHandler(fm_img_rotation);

        void fm_paint(object sender, PaintEventArgs e)
        {
            Graphics g = e.Graphics;
            g.DrawImage(img, 0, 0);
        }
        fm.Paint += new PaintEventHandler(fm_paint);


        Application.Run(fm);
    }
}
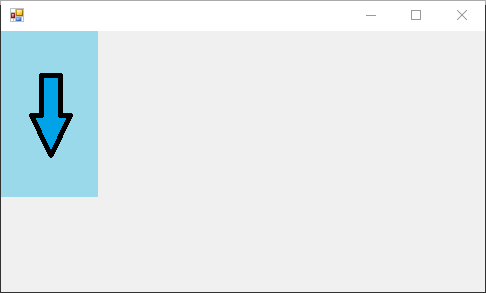
위 코드를 실행하면 아래와 같은 화면이 뜹니다.

그리고 Window를 클릭해보면 클릭 한 번 마다 이미지가 시계방향으로 90도씩 회전합니다.


추가된 부분은 아래와 같습니다.
        void fm_img_rotation(object sender, EventArgs e)
        {
            img.RotateFlip(RotateFlipType.Rotate90FlipNone);
            fm.Invalidate();
        }
        fm.Click += new EventHandler(fm_img_rotation);
Event method를 생성하고, Form이 Click될 때 Event가 발생하도록 fm.Click에 Event method를 등록한 것입니다.
- img.RotateFlip(RotateFlipType.Rotate90FlipNone);
여기서 주목할 부분은 이것입니다.
Image를 회전시키기위해서는 RotateFlip method를 사용합니다.
RotateFlip의 인자로서 전달된 RotateFlipType.Rotate90FlipNone은 이미지를 얼마나 회전시킬지를 의미합니다.
Rotate90FlipNone에서 90은 90도 회전이란 의미이며 FlipNone은 반전 효과를 주지 말라는 의미입니다.
회전의 기본 방향은 시계방향이므로 Rotate90FlipNone 이것의 의미는 "시계방향으로 반전없이 90도 회전시켜라" 라는 의미가 되겠죠.
RotateFlipType은 System.Drawing 하위에 있는 열거형 중 하나입니다.
RotateFlipType 열거형의 종류는 아래 C# document를 참고하면 됩니다.
https://docs.microsoft.com/ko-kr/dotnet/api/system.drawing.rotatefliptype?view=dotnet-plat-ext-6.0
RotateFlipType 열거형 (System.Drawing)
이미지가 회전되는 양과 이미지를 대칭 이동하는 데 사용할 축을 지정합니다.
docs.microsoft.com
- fm.Invalidate();
Invalidate() method는 Form을 다시 그려주는 역할을 합니다.
마치 새로고침같은 기능이죠.
        void fm_img_rotation(object sender, EventArgs e)
        {
            img.RotateFlip(RotateFlipType.Rotate90FlipNone);
            fm.Invalidate();
        }
        fm.Click += new EventHandler(fm_img_rotation);
그래서 위 코드를 다시 보면
RotateFlip으로 이미지를 회전시킨 후
Invalidate method로 Form을 다시 그립니다.
        void fm_paint(object sender, PaintEventArgs e)
        {
            Graphics g = e.Graphics;
            g.DrawImage(img, 0, 0);
        }
        fm.Paint += new PaintEventHandler(fm_paint);
이렇게 Form을 다시 그리면
Form이 그려질 대 발생하는 Event인 Paint Event가 실행되면서
회전된 Image를 그려주는 것이죠.
'C# > C#' 카테고리의 다른 글
| C# : Visual Studio Code C# 개발환경 설정 (VS Code C#) (0) | 2022.04.06 |
|---|---|
| C# : Convert.ToString() (10진수를 2진수/8진수/16진수로 변경하기) (0) | 2022.04.06 |
| C# : PictureBox (사진 띄우기, 도형 그리기, PictureBox의 Invalidate) (0) | 2022.04.05 |
| C# : MessageBox (0) | 2022.04.04 |
| C# : ShowDialog, Show (새로운 Window 띄우기) (0) | 2022.04.04 |


