| 일 | 월 | 화 | 수 | 목 | 금 | 토 |
|---|---|---|---|---|---|---|
| 1 | 2 | 3 | 4 | 5 | 6 | 7 |
| 8 | 9 | 10 | 11 | 12 | 13 | 14 |
| 15 | 16 | 17 | 18 | 19 | 20 | 21 |
| 22 | 23 | 24 | 25 | 26 | 27 | 28 |
- list
- numpy
- Google Spreadsheet
- matplotlib
- PySpark
- 파이썬
- google apps script
- PostgreSQL
- Java
- Excel
- Google Excel
- SQL
- django
- gas
- PANDAS
- Presto
- dataframe
- Github
- Apache
- c#
- array
- Tkinter
- math
- Redshift
- string
- Kotlin
- Python
- GIT
- hive
- Today
- Total
달나라 노트
Python matplotlib : subplots (여러 개의 그래프 한 번에 그리기, 여러 개의 그래프 나타내기, 여러 좌표 동시에 나타내기) 본문
Python matplotlib : subplots (여러 개의 그래프 한 번에 그리기, 여러 개의 그래프 나타내기, 여러 좌표 동시에 나타내기)
CosmosProject 2022. 1. 19. 19:38
matplotlib의 subplots는 여러 개의 그래프를 바둑판식으로 배열하여 나타내줍니다.
무슨 소리인지 하나씩 알아가봅시다.
import matplotlib.pyplot as plt

sub_plots = plt.subplots(nrows=3, ncols=2)

fig = sub_plots[0]
graph = sub_plots[1]

fig.suptitle('Multiple plots')
fig.tight_layout(pad=2)
plt.show()
위 코드를 실행한 결과를 봅시다.
그래프가 총 6개가 생겼고 이것이 3행 2열의 형태로 배치되어있습니다.
이런식으로 subplots는 한번에 여러 개의 그래프를 동시에 그려줍니다.
그래프를 동시에 그린다는 의미가 xlim, ylim method를 사용할 때와는 좀 다르죠.
(xlim, ylim 관련 내용 = https://cosmosproject.tistory.com/433)
xlim, ylim을 사용하면 하나의 좌표평면에 여러개의 그래프를 그렸으나
subplots는 좌표평면 자체가 여러 개가 됩니다.
sub_plots = plt.subplots(3, 2)
일단 가장 중요한 부분입니다.
subplots를 사용해서 그래프를 그리려면 위처럼 먼저 subplots 객체를 만들어야 합니다.
subplots는 argument로서 2개의 숫자를 전달받은 것을 볼 수 있습니다.
이것은 여러 개의 좌표평면을 어떤식으로 배열할지를 나타내는 정보입니다.
위에서 "그래프가 총 6개가 생겼고 이것이 3행 2열의 형태로 배치되어있습니다." 라는 내용이 있었습니다.
이 내용이 바로 plt.subplots(3, 2) 여기서 정해집니다.
3행 2열로 좌표평면을 배치할거라는 의미이며 3행 2열로 배치하니 총 6개의 좌표평면을 나타낼 수 있다는 것입니다.
import matplotlib.pyplot as plt

sub_plots = plt.subplots(nrows=3, ncols=2)
자 이제 이 부분을 다시 봐보죠.
처음에 봤던 코드의 위쪽 부분입니다.
subplots로 만들어진 객체를 sub_plots에 할당하고 있습니다.
그러면 어떠한 객체가 만들어질까요?
import matplotlib.pyplot as plt

sub_plots = plt.subplots(nrows=3, ncols=2)
print(sub_plots)
print(type(sub_plots))


-- Result
(
<Figure size 640x480 with 6 Axes>,
array([[<AxesSubplot:>, <AxesSubplot:>],
       [<AxesSubplot:>, <AxesSubplot:>],
       [<AxesSubplot:>, <AxesSubplot:>]], dtype=object)
)
<class 'tuple'>
위 코드에서 print를 이용해 sub_plots 변수에 저장된 객체가 어떻게 생겼는지 출력해보았습니다.
보니까 tuple이 출력되었구요 총 2개의 인자를 가지고 있습니다.
index = 0에 있는 요소(sub_plots[0])는 <Figure size 640x480 with 6 Axes> 로서 plots의 figure 정보를 담고있는 객체입니다.
index = 1에 있는 두 번째 요소(sub_plots[1])는 어떤 array인데 이 array 속에 바로 3행 2열로 배치된 좌표평면에 대한 정보가 담겨있습니다.
그래서 array를 보시면 2차원 array이며 행이 3개이고 열이 2개인 것을 볼 수 있습니다.
정리해보면 결국 subplots는 figure정보와 그래프 정보가 담긴 tuple의 형태라고 보면 됩니다.
import matplotlib.pyplot as plt

sub_plots = plt.subplots(nrows=3, ncols=2)

fig = sub_plots[0]
graph = sub_plots[1]
print(fig)
print(graph)


-- Result
Figure(640x480)
[[<AxesSubplot:> <AxesSubplot:>]
 [<AxesSubplot:> <AxesSubplot:>]
 [<AxesSubplot:> <AxesSubplot:>]]
그러면 이제 이 부분이 이해가실겁니다.
sub_plots 변수에 담긴 정보 중 index = 0에 있는 figure 정보는 fig라는 변수에 할당하고,
index = 1에 있는 6개의 그래프에 관한 정보는 graph라는 변수에 할당해서 더 쉽게 다룰 수 있도록 한 것입니다.
import matplotlib.pyplot as plt

sub_plots = plt.subplots(nrows=3, ncols=2)

fig = sub_plots[0]
graph = sub_plots[1]

fig.suptitle('Multiple plots')
fig.tight_layout(pad=2)
plt.show()
처음에 봤던 예시 코드로 다시 돌아와봅시다.
그러면 이제 왜 좌표평면이 6개가 생기고 그게 3행 2열로 배치되는지는 알 것입니다.
fig.suptitle('Multiple plots')
그리고 이 6개의 좌표평면 전체를 설정하는 제목을 지정할 때에는 위처럼 fig의 suptitle method를 쓰면 됩니다.
fig.tight_layout(pad=2)
fig의 tight_layout method는 각 좌표평면들이 얼마나 가깝게 배치되는지를 결정해주는데
pad 옵션을 높일 수록 그래프끼리 거리가 멀어지고, pad 옵션을 낮은 숫자로 지정할수록 그래프끼리의 거리가 가까워집니다.
import matplotlib.pyplot as plt

sub_plots = plt.subplots(nrows=3, ncols=2)

fig = sub_plots[0]
graph = sub_plots[1]

list_x = [1, 2, 3, 4, 5]
list_y = [1, 2, 3, 4, 5]
graph[0][0].plot(list_x, list_y)
graph[0][0].set_title('plot 1')
graph[0][0].set_xlabel('x')
graph[0][0].set_ylabel('y')

list_x = [1, 2, 3, 4, 5]
list_y = [5, 1, 4, 3, 2]
graph[1][1].plot(list_x, list_y)
graph[1][1].set_title('plot 4')
graph[1][1].set_xlabel('x')
graph[1][1].set_ylabel('y')

fig.suptitle('Multiple plots')
fig.tight_layout(pad=2)
plt.show()
위 예시는 subplots에 그래프를 그린 것입니다.
그래프를 그릴 때에는 각 좌표평면별로 x값의 list와 y값의 list를 전달하면 됩니다.
일반적인 plot을 이용할 때랑 동일합니다.
...

fig = sub_plots[0]
graph = sub_plots[1]

list_x = [1, 2, 3, 4, 5]
list_y = [1, 2, 3, 4, 5]
graph[0][0].plot(list_x, list_y)
graph[0][0].set_title('plot 1')
graph[0][0].set_xlabel('x')
graph[0][0].set_ylabel('y')

...
그런데 subplots에는 총 6개의 좌표평면이 있기 때문에 어느 좌표평면에 plot method를 적용하여 그래프를 그릴지 명시해줘야 합니다.
그래서 graph 변수에 [0][0] 처럼 어떤 그래프인지 indexing을 하여 그리면 됩니다.
import matplotlib.pyplot as plt

sub_plots = plt.subplots(nrows=3, ncols=2)

fig = sub_plots[0]
graph = sub_plots[1]
print(fig)
print(graph)


-- Result
Figure(640x480)
[[<AxesSubplot:> <AxesSubplot:>]
 [<AxesSubplot:> <AxesSubplot:>]
 [<AxesSubplot:> <AxesSubplot:>]]
아까 graph 변수에 저장된 좌표평면 정보가 2차원 array라고 했는데
2차원 array와 그래프의 배치는 동일합니다.
따라서 2차원 array에서 [0][0]으로 indexing되는 좌표평면은 왼쪽 상단에 있으니 실제 return되는 배치로도 왼쪽 상단에 있다는 의미이죠.
array에 있는 요소들의 위치가 실제 나타내지는 graph의 배치와 동일하다는 사실을 알면
array의 indexing과 어느 위치에 있는 그래프인지에 대한 매칭이 될겁니다.
(여기서 한 가지 주의할 점이 있는데 이건 맨 아래 부분에서 설명하겠습니다.)
import matplotlib.pyplot as plt

sub_plots = plt.subplots(nrows=3, ncols=2)

fig = sub_plots[0]
graph = sub_plots[1]

list_x = [1, 2, 3, 4, 5]
list_y = [1, 2, 3, 4, 5]
graph[0][0].plot(list_x, list_y)
graph[0][0].set_title('plot 1')
graph[0][0].set_xlabel('x')
graph[0][0].set_ylabel('y')

list_x = [1, 2, 3, 4, 5]
list_y = [5, 1, 4, 3, 2]
graph[1][1].plot(list_x, list_y)
graph[1][1].set_title('plot 4')
graph[1][1].set_xlabel('x')
graph[1][1].set_ylabel('y')

fig.suptitle('Multiple plots')
fig.tight_layout(pad=2)
plt.show()
다시 예시로 와서 여러가지 method를 살펴보면 다음과 같습니다.
graph[0][0].set_title('plot 1') --> set_title method는 각각의 subplot에 대한 title을 달아줍니다.
graph[0][0].set_xlabel('x') --> set_xlabel method는 각각의 subplot에 대한 x label 이름을 달아줍니다.
graph[0][0].set_ylabel('y') --> set_ylabel method는 각각의 subplot에 대한 y label 이름을 달아줍니다.
import matplotlib.pyplot as plt

sub_plots = plt.subplots(nrows=3, ncols=2)

fig = sub_plots[0]
graph = sub_plots[1]

list_x = [1, 2, 3, 4, 5]
list_y = [1, 2, 3, 4, 5]
graph[0][0].plot(list_x, list_y)
graph[0][0].set_title('plot 1')
graph[0][0].set_xlabel('x')
graph[0][0].set_ylabel('y')

graph[0][1].plot(list_x, list_y)
graph[0][1].set_title('plot 2')
graph[0][1].set_xlabel('x')
graph[0][1].set_ylabel('y')

list_x = [1, 2, 3, 4, 5]
list_y = [5, 1, 4, 3, 2]
graph[1][0].plot(list_x, list_y)
graph[1][0].set_title('plot 3')
graph[1][0].set_xlabel('x')
graph[1][0].set_ylabel('y')

list_x = [1, 2, 3, 4, 5]
list_y = [5, 1, 4, 3, 2]
graph[1][1].plot(list_x, list_y)
graph[1][1].set_title('plot 4')
graph[1][1].set_xlabel('x')
graph[1][1].set_ylabel('y')

list_x = [1, 2, 3, 4, 5]
list_y = [5, 1, 4, 3, 2]
graph[2][0].plot(list_x, list_y)
graph[2][0].set_title('plot 5')
graph[2][0].set_xlabel('x')
graph[2][0].set_ylabel('y')

list_x = [1, 2, 3, 4, 5]
list_y = [5, 1, 4, 3, 2]
graph[2][1].plot(list_x, list_y)
graph[2][1].set_title('plot 6')
graph[2][1].set_xlabel('x')
graph[2][1].set_ylabel('y')

fig.suptitle('Multiple plots')
fig.tight_layout(pad=2)
plt.show()
3행 2열(3, 2) 배치의 모든 좌표평면에 그래프를 그려본 화면입니다.
import matplotlib.pyplot as plt

sub_plots = plt.subplots(nrows=2, ncols=1)

fig = sub_plots[0]
graph = sub_plots[1]
print(graph)

-- Result
[<AxesSubplot:> <AxesSubplot:>]
import matplotlib.pyplot as plt
sub_plots = plt.subplots(nrows=1, ncols=3)
fig = sub_plots[0]
graph = sub_plots[1]
print(graph)
-- Result
[<AxesSubplot:> <AxesSubplot:> <AxesSubplot:>]import matplotlib.pyplot as plt
sub_plots = plt.subplots(nrows=3, ncols=2)
fig = sub_plots[0]
graph = sub_plots[1]
print(graph)
-- Result
[[<AxesSubplot:> <AxesSubplot:>]
[<AxesSubplot:> <AxesSubplot:>]
[<AxesSubplot:> <AxesSubplot:>]]아까 위에서 3행 2열의 배치로 인해 2차원 array의 형태로 graph 정보가 생성되었다고 했습니다.
위 코드는 subplots의 행/열 배치에 대해 생성되는 좌표평면의 array 정보입니다.
(3, 2)처럼 행과 열이 모두 2개 이상인 경우는 2차원 행렬로 생성되지만
(2, 1) / (1, 3) / (4, 1) 처럼 행 또는 열이 1개로 고정되어있는 경우는 1차원 array로도 표현이 가능하기 때문에 1차원 array로 생성된다는 것을 주의해야합니다.
import matplotlib.pyplot as plt

sub_plots = plt.subplots(nrows=2, ncols=1)
print(sub_plots)

fig = sub_plots[0]
graph = sub_plots[1]

list_x = [1, 2, 3, 4, 5]
list_y = [1, 2, 3, 4, 5]
graph[0].plot(list_x, list_y)
graph[0].set_title('plot 1')
graph[0].set_xlabel('x')
graph[0].set_ylabel('y')

list_x = [1, 2, 3, 4, 5]
list_y = [5, 1, 4, 3, 2]
graph[1].plot(list_x, list_y)
graph[1].set_title('plot 2')
graph[1].set_xlabel('x')
graph[1].set_ylabel('y')

fig.suptitle('Multiple plots')
fig.tight_layout(pad=2)
plt.show()
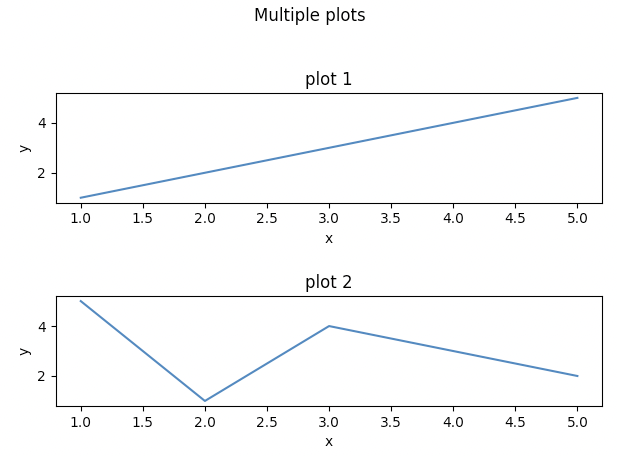
위 내용은 2행 1열 배치의 subplots를 그린 것입니다.
...
graph[0].set_title('plot 1')
graph[0].set_xlabel('x')
graph[0].set_ylabel('y')

list_x = [1, 2, 3, 4, 5]
list_y = [5, 1, 4, 3, 2]
graph[1].plot(list_x, list_y)
graph[1].set_title('plot 2')
graph[1].set_xlabel('x')
graph[1].set_ylabel('y')

...
주요하게 보실 부분은 2행 1열의 배치는 열이 1로 고정되어있으므로 좌표평면에 대한 array가 1차원 array로 생성되기 때문에
위 부분에서처럼 graph의 indexing도 1차원 array의 indexing처럼 했다는 것입니다.
import matplotlib.pyplot as plt

sub_plots = plt.subplots(nrows=3, ncols=2,
                         figsize=(10, 10))

fig = sub_plots[0]
graph = sub_plots[1]

fig.tight_layout(pad=2)


plt.show()
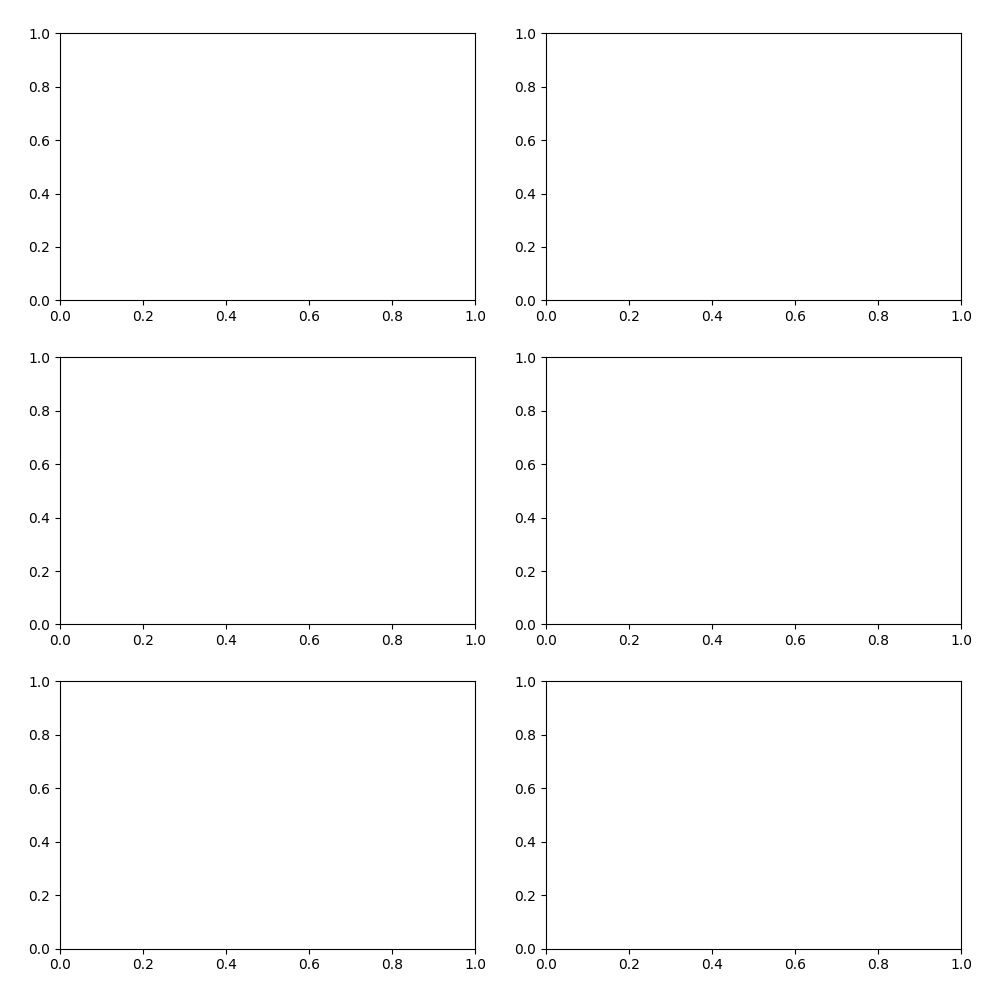
위처럼 subplots의 ficsize 옵션을 통해 output되는 viewe의 전체 크기를 조절할 수 있습니다.

위 코드를 실행하면 위처럼 더 큰 view가 생성됩니다.


