| 일 | 월 | 화 | 수 | 목 | 금 | 토 |
|---|---|---|---|---|---|---|
| 1 | 2 | 3 | 4 | 5 | 6 | 7 |
| 8 | 9 | 10 | 11 | 12 | 13 | 14 |
| 15 | 16 | 17 | 18 | 19 | 20 | 21 |
| 22 | 23 | 24 | 25 | 26 | 27 | 28 |
- list
- numpy
- array
- GIT
- django
- c#
- PostgreSQL
- Java
- Kotlin
- Excel
- PANDAS
- string
- math
- PySpark
- Presto
- Google Spreadsheet
- Tkinter
- 파이썬
- hive
- google apps script
- Google Excel
- SQL
- Apache
- Redshift
- matplotlib
- Github
- gas
- dataframe
- Python
- Today
- Total
달나라 노트
C# : Button 본문
Window에 사용할 수 있는 Button을 생성해봅시다.
아래 코드를 실행시켜봅시다.
using System;
using System.Windows.Forms;

class MyProgram
{
    public static void Main()
    {
        Form fm = new Form();
        fm.Width = 500;
        fm.Height = 300;

        Button btn = new Button();
        btn.Parent = fm;
        btn.Text = "Sample Button";
        btn.Width = 100;
        btn.Height = 30;

        Application.Run(fm);
    }
}
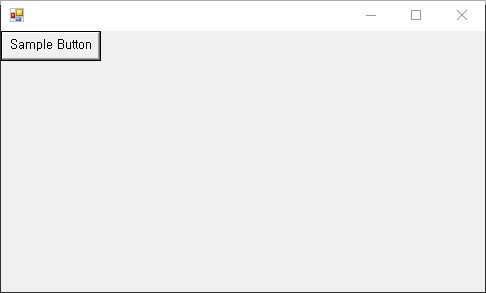
그러면 위같은 화면이 뜹니다.
버튼이 Window에 생성되었고, 버튼에 Sample Button이라는 텍스트가 떠있는걸 볼 수 있죠.
이제 코드를 부분별로 해석해봅시다.
        Form fm = new Form();
        fm.Width = 500;
        fm.Height = 300;
버튼을 만들려면 버튼이 들어갈 Window를 생성해야겠죠.
따라서 위 부분에서 Form class를 이용해 fm 객체를 생성합니다.
Form 객체는 Window를 생성하는 객체입니다.
그리고 Width, Height 옵션을 통해 Window의 가로 길이(Height)를 500으로, 세로 길이(Height)를 300으로 설정합니다.
        Button btn = new Button();
        btn.Parent = fm;
        btn.Text = "Sample Button";
        btn.Width = 100;
        btn.Height = 30;
그 다음 Button의 생성 부분입니다.
- Button btn = new Button();
Button은 Button class를 이용해서 생성할 수 있습니다.
Button class로 btn 객체를 생성합니다.
- btn.Parent = fm;
버튼이 소속되어 표시될 Window는 위에서 생성한 fm 객체이죠.
따라서 btn의 Parent를 fm으로 설정해줍니다.
- btn.Text = "Sample Button";
Text 옵션은 Button에 표시될 텍스트를 의미합니다.
Text 옵션을 Sample Button으로 설정합니다.
- btn.Width = 100;
- btn.Height = 30;
Width 옵션은 버튼의 가로 길이를 의미합니다.
Height 옵션은 버튼의 세로 길이를 의미합니다.
Application.Run(fm);그리고 fm 객체를 실행합니다.
여기까지가 기본적인 버튼의 생성입니다.
이렇게 버튼을 생성하고 여러 이벤트를 등록할 수 있습니다.
버튼의 다른 여러 옵션들을 봅시다.
1. Enabled
저희가 프로그램을 사용하다보면 버튼이 있지만 비활성화되어 누를 수 없는 버튼을 본 적이 있을겁니다.
이렇게 버튼의 활성화/비활성화는 Enabled 옵션을 이용해서 조절할 수 있습니다.
아래 코드를 봅시다.
using System;
using System.Windows.Forms;

class MyProgram
{
    public static void Main()
    {
        Form fm = new Form();
        fm.Width = 500;
        fm.Height = 300;

        Button btn = new Button();
        btn.Parent = fm;
        btn.Text = "Sample Button";
        btn.Width = 100;
        btn.Height = 30;
        btn.Enabled = false;

        Application.Run(fm);
    }
}

코드를 실행하면 위처럼 버튼은 생성되었으나 버튼이 비활성화되어 클릭할 수 없는 상태가 됩니다.
- btn.Enabled = false;
2. BackColor
Button의 BackColor 옵션은 버튼의 배경 색을 설정해줍니다.
using System;
using System.Windows.Forms;
using System.Drawing;

class MyProgram
{
    public static void Main()
    {
        Form fm = new Form();
        fm.Width = 500;
        fm.Height = 300;

        Button btn = new Button();
        btn.Parent = fm;
        btn.Text = "Sample Button";
        btn.Width = 100;
        btn.Height = 30;
        btn.BackColor = Color.Gray;

        Application.Run(fm);
    }
}
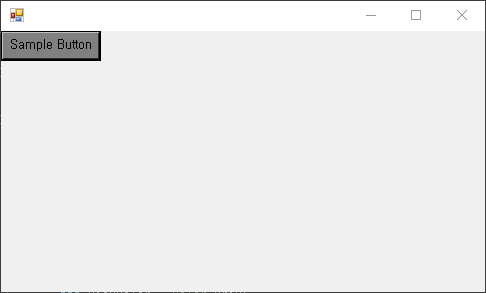
- btn.BackColor = Color.Gray;
Button의 BackColor 옵션을 회색(Gray)로 설정하였습니다.
따라서 위 이미지처럼 버튼의 배경색이 회색으로 채워진 것을 볼 수 있습니다.
3. Font
Button의 Font 옵션은 Button에 표시되는 글자의 글씨체, 글씨 크기, 글자 스타일을 정할 수 있게 해줍니다.
using System;
using System.Windows.Forms;
using System.Drawing;

class MyProgram
{
    public static void Main()
    {
        Form fm = new Form();
        fm.Width = 500;
        fm.Height = 300;

        Button btn = new Button();
        btn.Parent = fm;
        btn.Text = "Sample Button";
        btn.Width = 150;
        btn.Height = 50;
        btn.Font = new Font("Arial", 15, FontStyle.Italic);

        Application.Run(fm);
    }
}

- btn.Font = new Font("Arial", 15, FontStyle.Italic);
Font 설정 부분은 위와 같습니다.
Font 설정은 특이하게 Font 옵션에 Font class를 할당하여 설정할 수 있습니다.
Font class에는 3개의 인자가 들어갈 수 있습니다.
첫 번째 인자 = "Arial" -> 글씨체
두 번째 인자 = 15 -> 글씨 크기
세 번째 인자 = FontStyle.Italic -> 글씨 스타일
여기서 FontStyle은 System.Drawing.FontStyle 구조로 되어있는 라이브러리로부터 불러와지는 것입니다.
Font 설정에 사용할 수 있는 주요한 글씨체 옵션은 다음과 같습니다.
| Font | Description |
| Regular | 글씨 스타일 설정 없음 |
| Bold | 굵은 글씨체 |
| Italic | 기울어진 글씨체 |
| Unerline | 밑줄쳐진 글씨체 |
| Strikeout | 중간 취소선이 그어진 글씨체 |
4. ForeColor
ForeColor 옵션은 글자의 색상을 설정합니다.
using System;
using System.Windows.Forms;
using System.Drawing;

class MyProgram
{
    public static void Main()
    {
        Form fm = new Form();
        fm.Width = 500;
        fm.Height = 300;

        Button btn = new Button();
        btn.Parent = fm;
        btn.Text = "Sample Button";
        btn.Width = 150;
        btn.Height = 50;
        btn.ForeColor = Color.Blue;

        Application.Run(fm);
    }
}
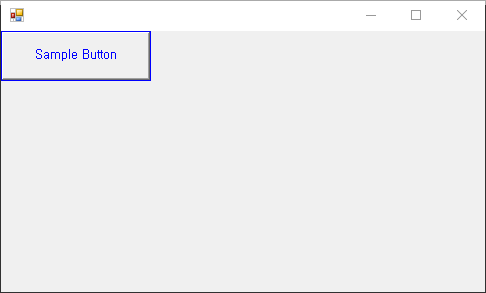
- btn.ForeColor = Color.Blue;
위 예시에서 ForeColor를 Blue로 설정했으므로 텍스트가 파란색으로 표시되는걸 볼 수 있습니다.
근데 Color.Blue라는 건 어디서 온걸까요?
using System.Drawing;
위 예시를 보면 Syste.Drawing 라이브러리를 불러온 것을 볼 수 있습니다.
꾸미는 작업을 하기 위해선 여러 가지 색상등을 불러와야하는데 색상관련 정보는 System.Drawing 라이브러리에 있습니다.
따라서 Color.Blue도 사실 구조가 System.Drawing.Color.Blue 이렇게 되어있는 것입니다.
때표적으로 System.Drawing.Color.색상 을 통해 사용할 수 있는 대표적인 색상은 아래와 같습니다.
| Color Code | Description |
| Black | 검정색 |
| White | 흰색 |
| Gray | 회색 |
| Red | 빨간색 |
| Yello | 노란색 |
| Green | 초록색 |
| Blue | 파란색 |
| Cyan | 시안색 |
5. AutoSize
AutoSize 옵션에는 true, false 값을 할당할 수 있습니다.
AutoSize = ture -> 글씨 크기에 맞춰 Button 크기를 자동으로 조절한다.
AutoSize = false -> 글씨 크기와 상관없이 Button 크기를 별도로 지정합니다.
using System;
using System.Windows.Forms;
using System.Drawing;

class MyProgram
{
    public static void Main()
    {
        Form fm = new Form();
        fm.Width = 500;
        fm.Height = 300;

        Button btn = new Button();
        btn.Parent = fm;
        btn.Text = "Sample Button";
        btn.AutoSize = false;

        Application.Run(fm);
    }
}

AutoSize 옵션을 true로 설정한 경우 위 이미지처럼 Sample Button 텍스트가 모두 보이지 않습니다.
버튼이 글자보다 작아서 버튼에 표시되는 글자가 잘린겁니다.
using System;
using System.Windows.Forms;
using System.Drawing;

class MyProgram
{
    public static void Main()
    {
        Form fm = new Form();
        fm.Width = 500;
        fm.Height = 300;

        Button btn = new Button();
        btn.Parent = fm;
        btn.Text = "Sample Button";
        btn.AutoSize = true;

        Application.Run(fm);
    }
}
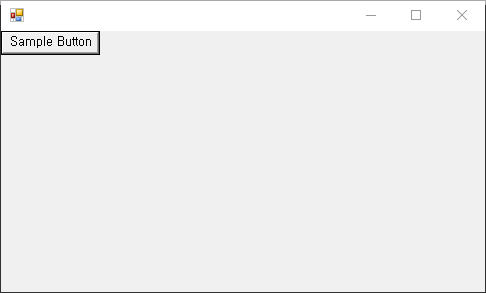
AutoSize 옵션을 true로 설정하면 위처럼 버튼의 크기가 버튼에 표시되는 Text의 크기에 맞춰서 자동으로 조절됩니다.
그래서 Sample Button이라는 텍스트가 모두 보이는 것을 알 수 있죠.
여기까지 해서 Button에 적용할 수 있는 여러 옵션들을 알아봤습니다.
Button의 서식(배경색, 글씨 색상, 글꼴 등)을 지정하는 옵션은 Label에서 지정할 수 있는 옵션과 비슷합니다.
따라서 아래 링크를 참고해보는 것도 좋습니다.
https://cosmosproject.tistory.com/554
C# : Label (Text Box, 텍스트 박스, 구조체, Structure)
C#에서 Label은 텍스트를 표시해주는 역할을 합니다. 텍스트 박스라고 보면 될거같습니다. Label을 어떻게 사용하는지와 Label 객체에 적용할 수 있는 여러 설정들(글씨 색깔, 글씨 정렬 등)을 알아봅
cosmosproject.tistory.com
아래 예시는 버튼의 클릭에 Event를 등록한 예시입니다.
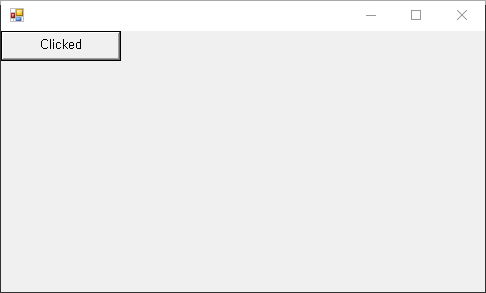
버튼을 클릭하면 버튼에 표시되는 문자를 Clicked로 바뀌도록 한 예시입니다.
using System;
using System.Windows.Forms;
using System.Drawing;

class MyProgram
{
    public static void Main()
    {
        Form fm = new Form();
        fm.Width = 500;
        fm.Height = 300;

        Button btn = new Button();
        btn.Parent = fm;
        btn.Width = 120;
        btn.Height = 30;
        btn.Text = "Sample Button";

        void btn_event_click(object sender, EventArgs e)
        {
            btn.Text = "Clicked";
        }
        btn.Click += new EventHandler(btn_event_click);

        Application.Run(fm);
    }
}
위 코드를 실행시키면 아래와 같은 Window가 뜹니다.

그리고 버튼을 클릭하면 아래 이미지처럼 버튼에 표시되는 문자가 Clicked로 바뀝니다.
EventHandler 관련 내용은 아래 링크를 참고하면 좋습니다.
https://cosmosproject.tistory.com/549
C# : EventHandler (마우스 이벤트 처리) (Window 클릭, 버튼 클릭, 마우스 오버, Window click, Button click, mous
마우스 클릭, 마우스의 위치 변화, 키보드 입력 등 사용자로부터의 어떠한 행동들을 이벤트(Event)라고 합니다. 이러한 Event들 정보를 받아 Event가 발생하면 무엇을 해라 라는 기능을 구현할 수 있
cosmosproject.tistory.com
'C# > C#' 카테고리의 다른 글
| C# : RadioButton, GroupBox (0) | 2022.04.04 |
|---|---|
| C# : CheckBox (0) | 2022.04.03 |
| C# : Label (Text Box, 텍스트 박스, 구조체, Structure, 글자 스타일, Font, FontStyle, 폰트스타일) (0) | 2022.04.01 |
| C# : Panel (FlowLayoutPanel, TableLayoutPanel, 컨트롤 배치, 소스 배치) (0) | 2022.04.01 |
| C# : CheckBox, CheckBox Event (0) | 2022.04.01 |


