
| 일 | 월 | 화 | 수 | 목 | 금 | 토 |
|---|---|---|---|---|---|---|
| 1 | ||||||
| 2 | 3 | 4 | 5 | 6 | 7 | 8 |
| 9 | 10 | 11 | 12 | 13 | 14 | 15 |
| 16 | 17 | 18 | 19 | 20 | 21 | 22 |
| 23 | 24 | 25 | 26 | 27 | 28 |
- Python
- gas
- numpy
- c#
- 파이썬
- Redshift
- Kotlin
- Google Spreadsheet
- Apache
- Tkinter
- hive
- SQL
- PostgreSQL
- matplotlib
- string
- django
- GIT
- Mac
- Java
- Google Excel
- math
- Github
- list
- google apps script
- dataframe
- array
- Excel
- PANDAS
- PySpark
- Today
- Total
목록분류 전체보기 (832)
달나라 노트
 Python tkinter : winfo_width, winfo_height, winfo_screenwidth, winfo_screenheight (Window 크기, 화면 크기, Window 가로 길이, 화면 가로 길이, Window 세로 길이, 화면 세로 길이, Label 가로 길이, Label 세로 길이, Label 크..
tkinter에서 Window 객체를 생성할 때 이 객체에는 여러 정보가 담깁니다. 이 정보에는 Window의 크기나 사용자가 사용하는 화면의 해상도 정보도 있습니다. 이러한 정보를 어떻게 얻을 수 있는지 알아봅시다. 1. winfo_width, winfo_height winfo_width = Window의 현재 가로 길이를 의미합니다. winfo_height = Window의 현재 세로 길이를 의미합니다. import tkinter as tk window = tk.Tk() window.geometry('500x400') label = tk.Label(window, text='Label') label.place(x=0, y=0) def show_screen_size(): width = window.win..
 Python tkinter : Button (버튼)
버튼은 클릭을 할 수 있으며 클릭을 할 때 어떤 기능을 하도록 할 수 있습니다. 일단 먼저 Window에 버튼을 띄워봅시다. import tkinter as tk window = tk.Tk() window.geometry('500x400') button = tk.Button(window, text='click') button.place(x=0, y=0) window.mainloop() - button = tk.Button(window, text='click') 먼저 Button 객체를 생성합니다. text는 버튼에 표시할 텍스트를 의미합니다. - button.place(x=0, y=0) 버튼이 Window에 표시될 위치를 지정합니다. 일단 이 코드에서 알 수 있는 것이 하나 있습니다. Button cla..
 Python tkinter : Label (라벨, 문자 띄우기)
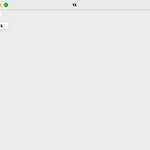
tkinter의 Label은 Window에 텍스트를 보여주는 역할을 합니다. 텍스트를 담아서 보여주는 박스라고 생각하면 됩니다. 간단한 사용법을 먼저 알아보고 Label method에 적용할 수 있는 여러 옵션들을 알아봅시다. import tkinter as tk window = tk.Tk() window.geometry('500x400') label = tk.Label(window, text='Test label') label.place(x=0, y=0) window.mainloop() 위 코드를 실행한 결과입니다. Window의 왼쪽 위에 Test label이라는 문자가 생겼습니다. 이렇게 Window에 텍스트를 띄워주는 것이 Label method의 기능입니다. 이제 Label method를 어떻게..
 Python tkinter : geometry (Window의 크기 설정, Window 가로 길이, Window 세로 길이)
tkinter의 geometry method를 이용하면 Window의 크기를 지정할 수 있습니다. import tkinter as tk window = tk.Tk() window.geometry('500x400') window.mainloop() - window.geometry('500x400') 사용법은 위처럼 geometry method의 인자로서 위같이 '가로길이x세로길이'의 형태의 인자를 전달하면 됩니다. 위 예시에서는 가로길이 = 500, 세로길이 = 400으로 지정되었습니다. 여기서 각 길이의 단위는 픽셀입니다. 즉, 가로길이 = 500픽셀, 세로길이 400픽셀 인 것입니다. 그 결과는 위와 같습니다. 기본 tkinter window의 크기보다 더 커진 것을 알 수 있습니다.